Every kitchen needs a sink, which is essential for meal preparation and dishwashing. Rust, mildew and faulty pipes can cause damage to this equipment.
Can you replace a kitchen sink when you do not replace the countertop? Luckily, the short answer is yes!
Let’s dive into this article to get in-depth explanations and ways to implement this task!
Can You Replace A Kitchen Sink Without Replacing The Countertop?
The short answer is yes. The good news is that you may replace the kitchen faucet without disturbing the countertop.
Replacing the old sink makes sense for a variety of reasons. For instance, poor installation may result in water leaking into this equipment.
It is crucial to fix damaged seals since they can potentially lead to water leaks.
Line blockages may force pipes to break because pressure builds inside the blocked pipes.
It may eventually result in tubes being damaged, necessitating the kitchen basin replacement.
As it’s metallic, rust frequently develops. Additionally, the kitchen’s water system may eventually lead it to corrode and sustain damage.
Mold development is possible due to ongoing contact with water. The mildew likes regions with high moisture and humidity, which might harm your basin.
It gradually loses its consistency due to worn connections and pipes, becoming more susceptible to cracks and strain.
Besides, to make your kitchen more aesthetically, you may upgrade and construct a brand-new wash basin of your preference.
How To Replace A Kitchen Sink Without Replacing The Countertop?
If you plan to replace your sink without replacing the countertop, let’s follow these instructions:
Gather The Necessary Tools.
Before installing a new sink, it’s better to collect necessary tools, including:
- Screwdrivers
- Pliers
- Wedge
- Razor blade
- Painter’s tool
Reduce Pressure From The Water Lines.
It’s essential to check the water pressure in the pipes before removing the sink.
Water pipes should have appropriate pressure since excessive pressure might result in leaks.
The basin removal process begins with releasing pressure from the water pipes.
Open every faucet to start the cold and hot water supplies. After that, let the water flow for around one to five minutes.
It will make it possible for the drainage system’s water pressure to force all the air in pipelines via the faucets.
Cut Off The Supply Of Water.
A plumbing system in the kitchen is essential since it makes it easier to wash dishes immediately after usage.
It’s also the first stage in the process of removing a kitchen basin. Switching off the water supply is essential if you want to remove it since it gives you convenience.
Sink removal also requires the removal of the faucets. As a result, turning off the water supply is necessary before removing the faucet.
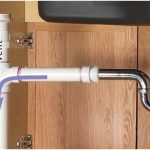
Remove The Drain Pipe.
Every home has a drainage system, which is connected to the piping in the cooking area.
Its function is to discharge the wastewater from your house into the sewage system.
It’s time to use pliers to release the connections fastened to the drainage pipes. To disconnect the tubes, turn the pliers counterclockwise.
If the pliers are made of plastic, they may potentially damage the drain pipes. As a result, you may even take the joints out by yourself.
Remember to set a bucket down as well after disconnecting the hose pipes.
This bucket acts as a storage place to gather any remaining water that may be in the pipelines.
Take off the hose holding a dishwasher drain’s connection. You can detach the waste disposal device with a screwdriver.
Loosen The Seal By Cutting The Caulk.
It’s better to start from the corner to unfasten the kitchen basin from your countertop to prevent damage.
After that, slide the knife blade between the sink’s rim and the countertop.
Next, use a hammer to gently tap the corner to make an opening between the basin and the countertop.
Now insert the wedge to make removal simple and practical. Keep the wedges to the kitchen basin’s front to separate it from your countertop.
To prevent the countertop from being damaged, you must be careful when using the tools and wedge.
To free the basin from that corner, you need to insert a wedge at the rear of it. The seal should then crack as you wedge around the sink’s other edges.
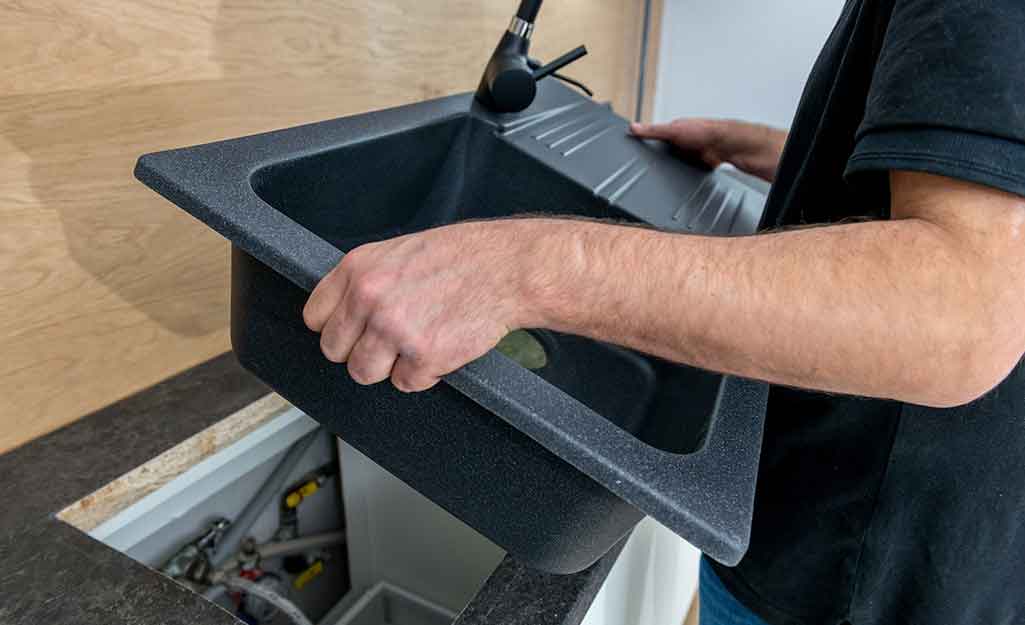
Replace The Kitchen Sink.
It is simple to place a new sink on the current countertop. Pick the item, however, based on the precise measurement.
Before attaching a brand-new kitchen basin, ensure the area is ready and clean. Apply the adhesive along the countertop’s rim to position it.
After positioning it, firmly push the sink into the caulk from the back, front, edges, and corners.
If necessary, it is best to replace the old fasteners and faucets. Finally, reattach the drain pipes to finish your project.
In A Nutshell
We hope your project will be much easier with our guidelines. If you have further questions, feel free to leave a comment below.
Thanks for reading, and see you in the next post!