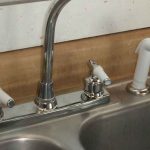
An aerator is so small in your kitchen that sometimes you forget the existence of this detail. You don’t recognize it until it has problems and requires replacement. Now facing the faulty aerator, you don’t know whether you can replace it yourself or have to call a plumber.
Don’t worry! We are here with the answer to how to remove an aerator from a kitchen faucet to push you out of the pickle.
What Is An Aerator?

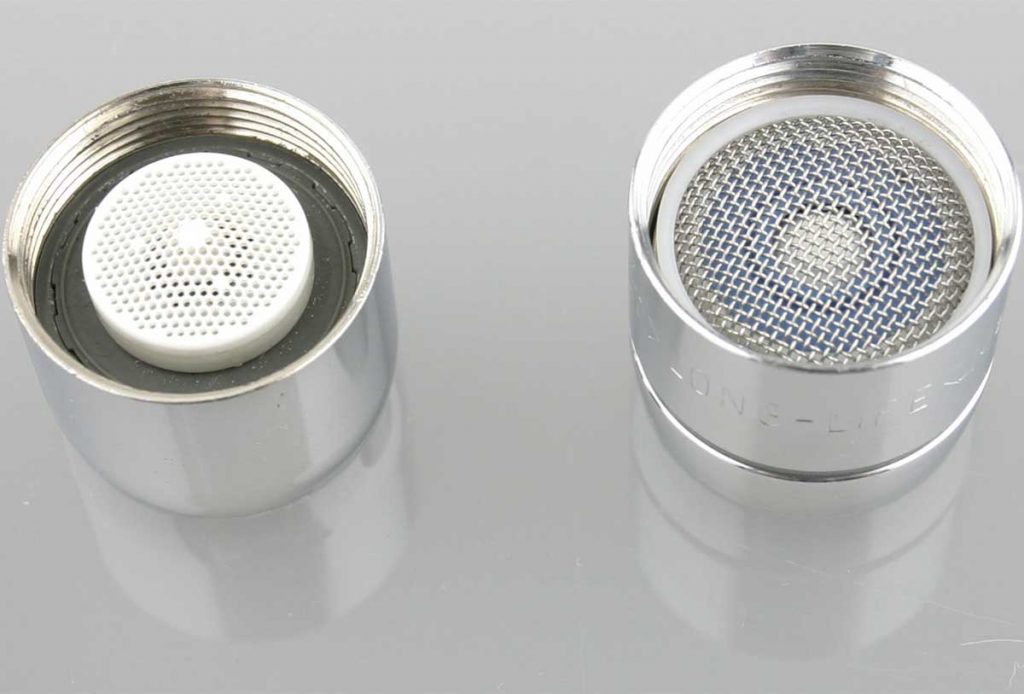
In general, an aerator is a piece of equipment that adds air to water or soil. So an aerator at the bottom of your kitchen faucet is used to prevent splashing and provide air to the water flow. In this way, the water stream coming out from the faucet is straight and pressured.
Why Do Aerators On Kitchen Faucets Stop Working?
The aerator itself can last for many years. How often you need to clean or replace it depends on the quality of the water. Water that is treated properly and comes from a safe source remains uncontaminated, so it will bring fewer pollutants. As a result, the aerator gets fewer substances stuck in it.
Our water supply contains minerals as well as particles that enter the water supply system on a regular basis. When building up over time, deposits of minerals or grit can block aerators, resulting in poor water flow or an inconsistent stream. The flow of water decreases and flows get more dispersed.
When they congregate and make the mesh of the aerator clogged, it’s time for a replacement.
Instructions
Necessary Equipment
- Channel-lock pliers
- Needle nose pliers
- Cloth
- Hairdryer
- Vinegar
- Toothbrush
How To Remove An Aerator From A Kitchen Faucet?
Step 1: Remove The Aerator
Before using any tools to get the aerator out of the faucet, you should try to do that by hand. If you can’t take it out after using up all of your strength, you might need a piece of equipment. Some aerators are hidden within the faucet and require a special tool to remove.
In this case, the first thing you need to do is place a cloth over the top of the aerator housing. Then, use the channel lock pliers to unscrew the unit gently. This will stop the housing from bending out of shape or being scratched. If you have a recessed aerator, unscrew it by using the tool provided.
If pliers alone aren’t enough to pull out the aerator, try to gently heat it with a hairdryer for thermal expansion. Using heat, can somewhat enlarge the metal and allow you to release it easily with pliers.
A lighted flame held close to the aerator may also expand the metal. But you need to be cautious when using heat since plastic parts inside can melt if you heat the aerator over a certain temperature.
Step 2: Clean The Aerator
After removing the aerator, disassemble it and remember how smaller components are arranged. The aerator usually has three main parts: housing, mesh, and gasket. These parts need to be reassembled in the correct manner to operate properly.
Remove any big particles of sediment by rinsing. If you find any clogged holes in the mesh, use a paper clip or a sewing needle to wipe them out. You can use a toothbrush to clean away any dirt on different parts of the aerators.
When debris is hard to remove, immerse the screen and other components in diluted vinegar or CLR and leave them in the solution overnight. This will allow you to easily wash any dirt caught in the mesh screen by rinsing or using the brush.
Step 3: Replace The Aerator If Necessary
Although you can clean the aerator and reuse it, it will be better if you replace it annually to ensure its peak efficiency. It is affordable and comes in a variety of models.
You can easily find a new one that perfectly fits your faucet. So don’t hesitate to replace the aerator in case you’ve used your old one for a long time.
Step 4: Reassemble The Aerator
First, you need to align the components as you did when you separated them and screw the complete aerator into the faucet spout. Tightening the aerator is enough to attach it to the faucet.
However, if you observe leakage around the aerator threads, you should use channel-type pliers to tighten the aerator further.
Conclusion
The aerator requires periodic cleaning or replacement, but luckily, this process is simple and easy to do. We hope after reading, you will know how to remove an aerator from a kitchen faucet.
Now find the essential tools you need and get down to it. We bet that you can have an easy experience when replacing the aerator.