Many people have faucets in their kitchen and bathrooms, most of them made from metal. The most common problem you can face with these faucets is the leaking kitchen faucet base.
If your faucet is leaking, you need to know how to seal the kitchen faucet base. This writing will help you with all you need to do.
Choosing Between Silicone Caulk And Plumber’s Putty
There are two easy ways to seal a leaking faucet, and both can be highly effective. However, their effectiveness will be predicated by several factors, including the size of the project itself as well as the type of repair you’re making, for example.
Silicone caulk usually dries into a solid form, whereas plumber’s putty remains flexible.
The former will set and harden over time, while the latter will remain soft and malleable, making it more appropriate for small projects like sink drains and bathroom fixtures such as faucets at the joint where the trim meets cabinetry.
Plumber’s putty isn’t an adhesive but is sold in stores under this name instead. It’s best for creating a watertight seal around areas like joints that are prone to leakage around plumbing parts like your kitchen sink or bathroom fixtures.
Especially those that involve meticulous attention to aesthetics such as tile or custom-made cabinets or fittings in your bathroom.
How To Seal A Faucet
Step 1:
First, you need to clean all dirt. When you are replacing a faucet, any old sealant off of the countertop where the new faucet will sit. If there is still water dripping coming out of the tap, make sure you cut off that flow of water before moving on.
Use a commercial cleaning product on any particularly dirty spots or areas and then wash it with soap and water while rinsing it with fresh water so as not to leave soap residue that may affect how well the new faucet’s seal adheres in place after installation.
Step 2:
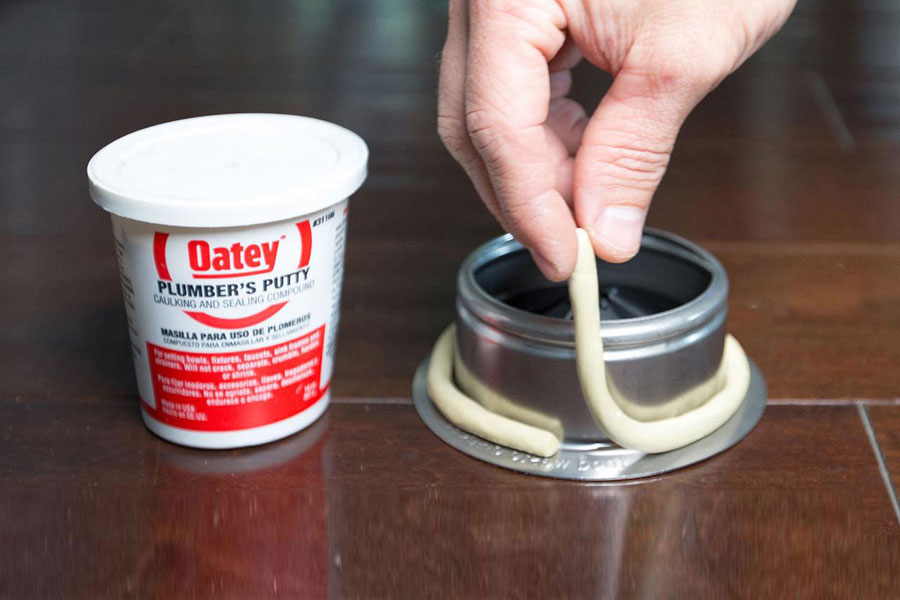
The second step is choosing a sealant. Plumber’s putty and silicone are popular choices among do-it-yourself bathroom and kitchen faucet repairs. Both are inexpensive and capable of springing the worst leaks quickly, but which one should you pick?
Consider two things: the size of the leak and the material used in your countertop. If you have a sink on the floor or an old cast iron tub, silicone can be difficult to remove if it ends up staining it.
In any case, the plumber’s putty takes hours or even days to cure, meaning that the faucet will not be functioning properly until then.
Step 3:
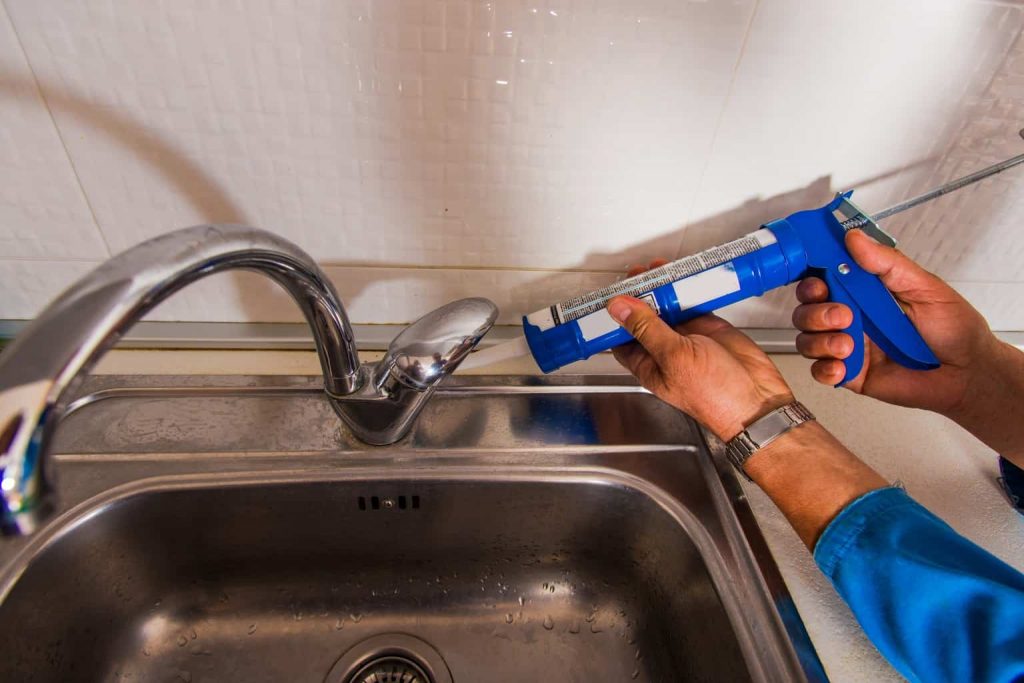
In the third step, you shall apply a sealant. Roll some silicone between your hands until it forms a rope about 3/ inches in diameter. Apply it to the faucet bottom base along all its edges. If you are using silicone sealant, run some along its bottom surface.
Step 4:
Lastly, you must install and use the faucet. After installing it onto the sink or countertop, you might need to remove excess kitchen faucet sealant with a clean cloth or a putty knife. If you got a faucet seal with a plumber’s putty, you could use it right away once installed.
In the case of using silicon as a sealant, you’d better check your instructions about how long it will take to cure before using the faucet itself. The usual cure time for silicone is 24 hours.
FAQs
Should You Silicone Around Faucet Base?
Faucets often come with rubber or plastic washers that eliminate potential leaks. However, if your faucet doesn’t have a washer, you should call a plumber to repair the pipes.
This will prevent any leakage that could result in costly repairs like those for cabinets, walls, floors, and more. Mold can also cause serious health problems such as allergies and even death – so be sure to schedule service as soon as possible!
What Causes A Faucet To Leak At The Base?
Leaks in a faucet’s spout will cause water to drip out intermittently around the base, typically caused by worn O-rings located under the spout. To access these worn O-rings for replacement, all that is needed is to wiggle and pull up on the spout to get it off.
While different faucets have different designs, you usually have to remove handles and other parts to remove the spout.
Conclusion
We hope this writing on how to seal a kitchen faucet base gives you some ideas that will help you keep your kitchen faucet working properly for a long time.
If you have a leaky faucet or you want to upgrade your kitchen faucet, you can consider replacing the washers. In addition, you can also consider replacing the entire tap to ensure that the problem is solved for good.